
NAPLES, FL · SKIMMER AND DRAIN
Skimmer and main drain repair, the quiet leak
A separated skimmer throat loses water behind a wall that looks completely sound. No wet patch, no crack, no clue, and a level that keeps dropping. There is one clue it does give, and this page teaches you how to read it.
In short
What this work actually involves
Skimmer and main drain repair replaces failed skimmer bodies, throats and drain assemblies, and ties the repair back into the surrounding deck and interior finish. Splash Pools LLC is a Naples, Florida pool contractor owned by Clayton Waggoner, serving Naples, Collier County, Marco Island, Bonita Springs and Estero.
Part one
Why are old skimmers such a common leak source?
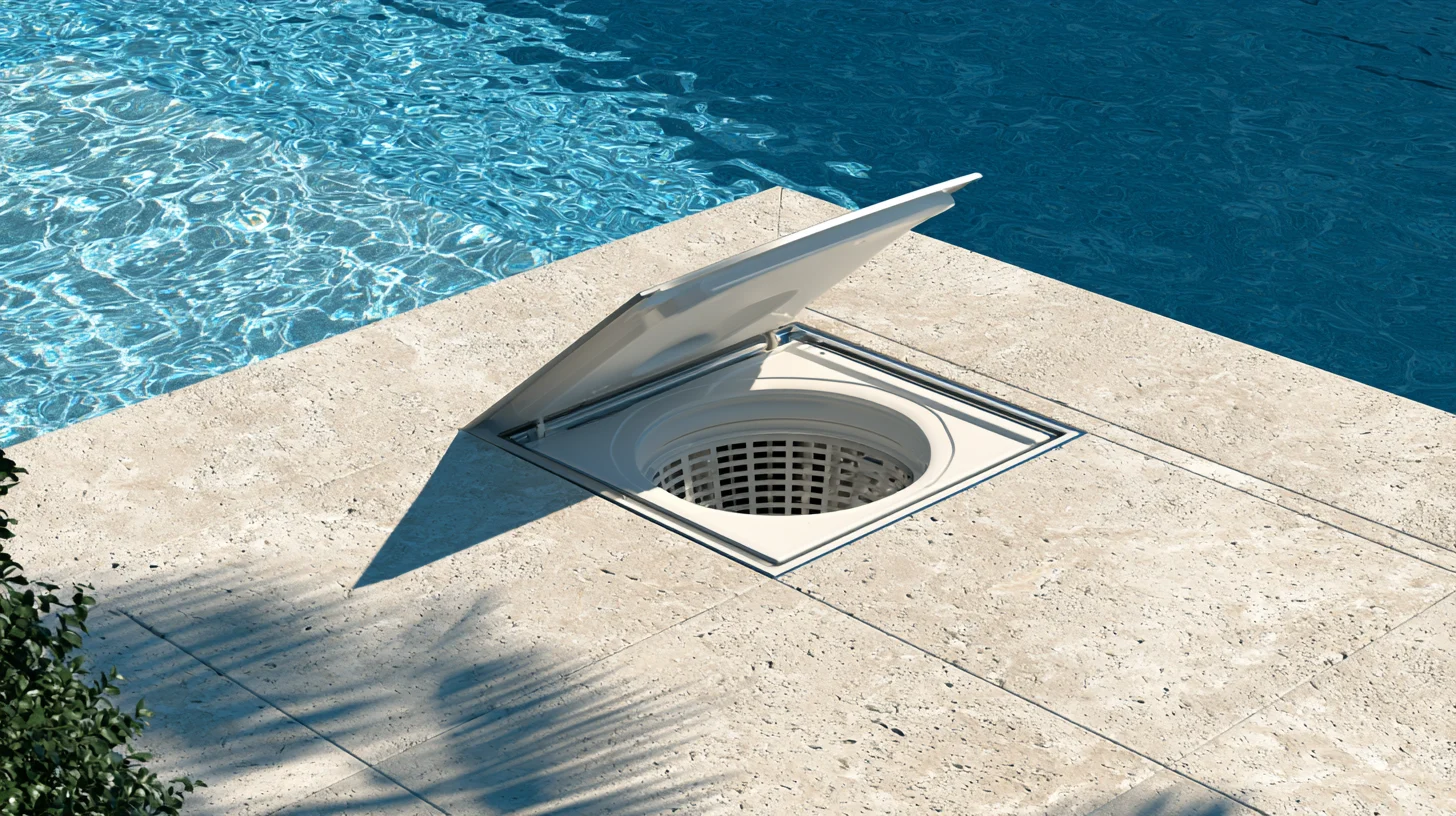
Because the skimmer is a plastic component cast into a concrete shell, and the two move and age differently. Over decades the throat separates from the body or from the shell, and water leaves through a gap that is completely hidden behind sound-looking wall and deck.
Original skimmers in Old Naples pools built in the 70s and 80s are among the most common hidden leak sources in the county, precisely because those pools are old enough for the separation to have happened. The skimmer that went in when the pool was built is the skimmer that is still there, and it has been expanding and contracting against concrete for forty or fifty summers.
The mechanism is worth understanding, because it explains everything else on this page. A skimmer is a rigid plastic box with a plastic throat reaching through the wall to the waterline, and the whole assembly is cast into a concrete shell and a concrete deck. Plastic and concrete do not move together. They expand at different rates, they age at different rates, and every hot afternoon and cool night works the junction between them a fraction. The throat, the narrow neck where the plastic passes through the structure, is where that lifetime of movement concentrates, and it is where the seal eventually lets go.
Ground movement speeds it up. On canal streets and older lots where the deck has settled toward the water, the same movement that leaves hollow coping and a worked bond beam at the pool edge is prying at the skimmer joint too. The skimmer sits in the deck and connects to the wall, so anything that moves one against the other is working the throat.
The reason it goes undiagnosed is that there is nothing to see. The deck is dry, the plaster is intact, and the only symptom is a level that drops faster than evaporation explains. Water leaving through a separated throat goes into the ground behind the shell, and in this part of Florida the ground takes it without a trace.
Isolation testing is what finds it, which is why pool leak detection comes first rather than guessing. But before anyone tests anything, there is a check you can run yourself, and it costs nothing.
Part two
The skimmer checks you can do yourself
Watch where the level stops. A leak in the skimmer body or throat often slows or stops once the water falls just below the skimmer opening, because the leak is now above the waterline. With the pump off and the water still, a drop of dye drifting toward the throat seam says the same thing. Neither check costs anything.
The level-stabilization check is the one visible clue a throat leak gives, and it is simple physics. A leak can only lose water that can reach it. If the failure is in the skimmer body or at the throat, it sits at or just below the skimmer mouth, so once the water level falls below the opening the leak is high and dry and the loss slows dramatically or stops. A pool that drops steadily and then holds just below the skimmer mouth is pointing at its own skimmer.
Step 1. Turn the auto-fill off completely. Most Collier County pools have one, and it will quietly replace whatever the pool loses and hide the whole pattern. Find the valve, usually under a small round lid in the deck near the pool, and shut it off.
Step 2. Mark the level with tape or a grease pencil and let the pool do what it does over the next few days. Do not top it up. What you are watching for is not the rate of the drop but where the drop changes.
Step 3. Read the result. If the level fell steadily and then slowed or stopped just below the skimmer opening, the skimmer body or throat is the prime suspect. If the level sailed past the mouth without pausing, the loss is somewhere lower: the skimmer line, another fitting, the light niche or the shell, and the next section explains how those get separated.
There is a second check for the patient. With the pump off and the water dead still, a small wisp of food coloring released slowly right at the seam where the skimmer throat meets the pool wall will tell on a leak. Water only moves toward a place it can leave, so dye drifting steadily into the seam rather than hanging in place is the throat confessing. Stillness is everything: no pump, no wind ripple, no swimmers, and give the water twenty minutes to settle first.
While you are there, look at the obvious parts. A cracked faceplate, loose faceplate screws or a stiff, broken weir door are real faults, but they are surface faults: the faceplate seals the liner or finish joint at the mouth, and on a concrete pool a worn one rarely explains serious water loss on its own. A skimmer lid or deck box that is wet inside after dry weather is worth mentioning when you call, but it is a hint, not a verdict.
One honest caveat. This check separates the skimmer from everything lower, but it cannot separate the skimmer body from the skimmer line, because a line failure close to the skimmer can mimic the same pattern. Pools of the same era in Naples Park have both failure modes in play at once often enough that the distinction gets its own section below. What your observation does is turn a vague worry into a specific, testable question, and that makes the professional visit shorter and the finding cheaper to reach.
Part three
Patch, repair or replace: which is honest for your skimmer
A putty or fiberglass patch can hold where a young skimmer has one local defect in otherwise sound plastic. A throat that has separated from a decades-old shell is a replacement, and a patch there buys a season, not a repair. The age of the pool and where the failure sits decide it, which is why the answer comes after dye testing, not before.
This is the fork where homeowners get contradictory quotes, and both quotes can sound reasonable. One contractor says the skimmer needs replacing. Another says he can fix it with epoxy putty in an afternoon for a fraction of the price. On a forty-year-old pool, who is right?
The honest answer depends on two things: what failed, and why. A patch is a fair repair where the skimmer is relatively young, the plastic is still sound, and the defect is a single local one: a small crack in the body, a gap at one joint, a void the dye test can point to precisely. Epoxy and fiberglass bond well to clean, stable plastic, and a patch on a defect like that can genuinely hold.
A separated throat on an original 70s or 80s skimmer is a different animal. The separation did not happen because one spot failed; it happened because forty years of differential movement between plastic and concrete finally opened the junction, and that movement has not stopped. A patch bridges a live joint. The same cycles that opened the gap will work the patch, and the aged, brittle plastic around it gives the repair nothing solid to hold. That patch is a season of dry weather sold as a repair, and the leak comes back with the price of the patch already spent.
It is worth knowing why the patch gets recommended so often. Part of this market is detection-only: firms that find leaks but do not do structural work, so a patch applied from inside the pool is the only repair they can sell. When the tool box only contains patches, every skimmer looks patchable. Splash Pools is a structural pool contractor. We open decks and replace skimmers as ordinary scope, so we have no reason to talk you out of a patch that would honestly hold, and no reason to sell you one that would not.
Either way, the answer comes after the dye test, not before. Where the dye goes tells us whether the failure is one local defect or a moving joint, and that finding, in writing, is what the patch-or-replace decision should rest on. A quote issued before anyone has watched dye at the throat is a guess with a number on it.
Part four
Skimmer body or skimmer line: testing them separately

By testing them separately. The skimmer line and the skimmer body are different failure points, and pressure testing the line tells you whether the loss is in the run or at the fitting. Dye testing at the throat confirms it. Guessing between them is how the wrong thing gets dug up.
The distinction matters commercially. A failed skimmer body is a localized repair: one opening in the deck, one assembly out, one in. A failed skimmer line under a deck is a trenching job, and on some pools a case for rerouting rather than digging, which is underground plumbing repair territory. Same symptom at the waterline, very different scope underground.
The tests are different because the failures are different. The line is tested by isolating it and putting it under pressure: a line that will not hold pressure is losing water somewhere along its run, and listening equipment and the pressure behavior narrow down where. The body and throat are tested with dye at the seams while the water is still. One test interrogates the pipe, the other interrogates the fitting, and running both is how you avoid opening the deck over the wrong one.
This is also where your own observation from the self-check earns its keep. A level that stopped just below the skimmer mouth argues for the body or throat. A level that kept falling past the mouth argues for the line or something lower. Neither observation is proof, but each tells the testing where to start.
Both can be true at once on an old pool. A worked throat and a root-damaged line are products of the same decades, and finding one does not rule out the other, which is another reason to test rather than assume.
The written finding sets out which was tested and what was ruled out, before any excavation is agreed. If the finding says the line, you are reading the right page but booking a different job, and we will say so plainly.
Part five
What replacing a skimmer involves
Opening the deck around the skimmer, removing the failed body and throat, setting a new assembly, tying it back into the shell and plumbing, then reinstating the interior finish and the deck. It is a modest repair with a moderate amount of access work around it, and the deck reinstatement is part of the scope, not a referral.
There is no honest way to replace a separated skimmer without opening the deck around it, and we would rather say that plainly than promise otherwise. The opening is local: enough concrete or pavers come up to expose the skimmer body and the top of its plumbing, the old assembly comes out, and a new body and throat are set, levelled and tied into the shell and the line.
Because the deck has to come up locally, this is another job where reinstating on a properly compacted base matters. A settled patch around a skimmer is an obvious blemish in a deck, and the settlement usually shows within the first rainy season if the base went back loose. Compacting the backfill in lifts before the surface goes back on is the unglamorous step that decides how the repair looks in five years.
The interior finish also has to be tied back in at the skimmer mouth. Where the pool interior is close to end of life anyway, doing both together avoids a visible patch, which is why this repair and pool resurfacing are often scheduled as one project on older pools.
The part of this job that gets underestimated is everything after the plumbing: the finish tie-in, the base compaction, the deck going back so the repair disappears. Much of this market handles that with a referral to a second contractor, which is how a one-week repair becomes a two-month project with a seam of responsibility down the middle. Here the crew that sets the skimmer reinstates the deck, the whole scope answers to Clayton, and skimmer work sits inside our wider pool repair in Naples practice rather than being handed off. Whoever you hire, verify them: the DBPR lets you verify a Florida pool contractor’s license before any deck is opened, ours included. Ask us for the number, then check it.
Part six
Main drains: rarely guilty, expensive to accuse
Main drains fail less often than skimmers but sit in the floor, so reaching one wrongly is the most disruptive mistake available on this job. Testing confirms or clears the drain before the floor is touched, and on an older pool the drain conversation is also a suction-outlet safety conversation worth having while the pool is open.
The main drain gets accused often and convicted rarely. It sits at the deepest point of the pool, its plumbing runs under the floor, and reaching it means draining the pool and breaking into the shell where the water pressure is highest. Opening a pool floor on a hunch, and finding a sound drain, is the most expensive way to learn that the leak was in the skimmer throat all along.
So the drain is tested like everything else before it is touched. The drain line is isolated and pressure tested from the equipment pad, and dye at the drain sump with the pump off checks the fitting itself. A drain that holds pressure and ignores dye is cleared without a single tile lifted, and on most older Naples pools that is exactly what happens: the skimmer, not the drain, turns out to be the source.
When drain work is genuinely needed, it is worth doing completely. Florida’s residential pool code, in the private swimming pools chapter, R4501, requires entrapment protection for suction outlets in line with the ANSI/PHTA/ICC standard, and the covers and fittings that do that job have improved enormously since a 1970s pool was built. We make no claim about what any particular pool has until we have seen it, but if your pool is open for drain or skimmer work, that is the natural moment to look at what is on the suction outlets and bring the fittings up to current practice.
The rule that runs through this whole page applies double at the floor: certainty before excavation. The level check costs nothing, the dye and pressure testing cost little, and the finding they produce is what protects you from paying for the wrong hole. If your pool is losing water and the pattern points anywhere near the skimmer or the drain, book a consultation and we will start with the tests, not the saw.
Straight answers
Questions Naples owners actually ask
 Clayton Waggoner Owner, Splash Pools LLC
 Clayton · Owner
Sometimes, where the failure is at a joint, a faceplate or one small local defect in otherwise sound plastic on a younger skimmer. Where the throat has separated from the shell on a decades-old pool, replacement is the durable answer, because a patch over a moving joint buys a season rather than a repair. The dye test finding is what decides it. Clayton · Owner
Enough to reach and reset the skimmer body, which is a localized opening around the skimmer rather than a trench across the deck. The area is reinstated as part of the same scope, and reinstating it on a properly compacted base is what stops the patch settling and showing later. A skimmer line repair is a different, larger answer. Clayton · Owner
There will be a tie-in at the skimmer mouth where the interior finish meets the new assembly, and on a newer finish it is discreet rather than invisible. On a pool due for resurfacing anyway, doing both together removes any visible patch, which is why the two jobs are often scheduled as one project on older pools. Clayton · Owner
Very possibly, and on an older Old Naples or Naples Park pool it is one of the first things to rule out. The difference matters because a skimmer is a localized repair and a plumbing run under a deck is not. Testing them separately settles it, and watching whether the level stops just below the skimmer mouth costs nothing to check first. Clayton · Owner
Less common than a skimmer leak on the pools we see, but far more disruptive to reach, because the drain sits in the floor at the deepest point. That is exactly why it should be confirmed or cleared by pressure and dye testing before the floor is opened. Most of the time the testing clears the drain and points back at the skimmer. Clayton · Owner
It depends on whether the failure is in the body, the throat or the line, and on what the deck and interior finish around it need to go back properly. A patch, a reset and a full replacement are different scopes, so the dye and pressure testing come first and the quote comes with the written finding. Call 239-450-5933. Clayton · Owner
A dry deck rules out very little, and plumbing testing fine actually narrows it usefully. That combination points at the structure or the fittings: skimmer throat, return fittings, light niche, or a shell crack. Dye testing at each of those is what separates them, and on an older pool the skimmer is the first place to look.Talk to Clayton
Send the details, get a call back.
A sentence or two is enough. You get a call back from the person who does the work, not a dispatcher.
Service area
Where we work
Click any marker. What fails is genuinely different from one neighborhood to the next, and the card says which.
Where we work
Naples and Collier County, plus Marco Island, Bonita Springs and Estero. What fails is different in each, and that is what decides the work.
- Port Royal waterfront, architectural review, deck must match the house
- Old Naples pools built in the seventies and eighties, due for everything at once; original skimmers
- Aqualane Shores canal homes, deck movement near the seawall separates coping
- Park Shore Gulf Shore Boulevard salt air hits the tile line first; seasonal vacancy
- The Moorings direct salt air exposure, waterline tile failure
- Coquina Sands seventies and eighties pools; decks poured over uncompacted fill
- Royal Harbor canal homes, high water table hides leaks; coping separation
- Grey Oaks gated architectural review on anything visible from the street; spa additions
- Quail West natural stone decking matched to the house; spa additions
- Pelican Bay empty April to November; automation and heat pumps for year-round swimmers
- Lely Resort natural gas supply; builder decks aging out; year-round pump runtime
- Fiddler's Creek natural gas heater sizing; builder-era paver decks losing their base
- The Vineyards year-round swimming, heat pumps and variable speed payback
- Naples Park mature landscaping into pool plumbing; original skimmers; storm-loaded filters
- Pine Ridge Estates mature landscaping finds underground pool plumbing
- Vanderbilt Beach equipment pads corrode fast; storm season loads filters
- Golden Gate Estates well water iron staining on marcite; propane rather than natural gas
- Isles of Capri canal water table hides leaks; heavy equipment-pad corrosion
- Marco Island barrier island salt air corrodes heaters from the inside out
- Bonita Springs pool decks and patios on Southwest Florida soil
- Estero deck and patio base engineered for local soil
- Ave Maria newer east-county builds, patios and walkways matched to existing hardscape
Ready when you are
Tell us what the pool is doing.
A sentence or two is enough. You get a call back from the person who does the work, not a dispatcher.